
Most Common Image Ratios and How They Effect Photos
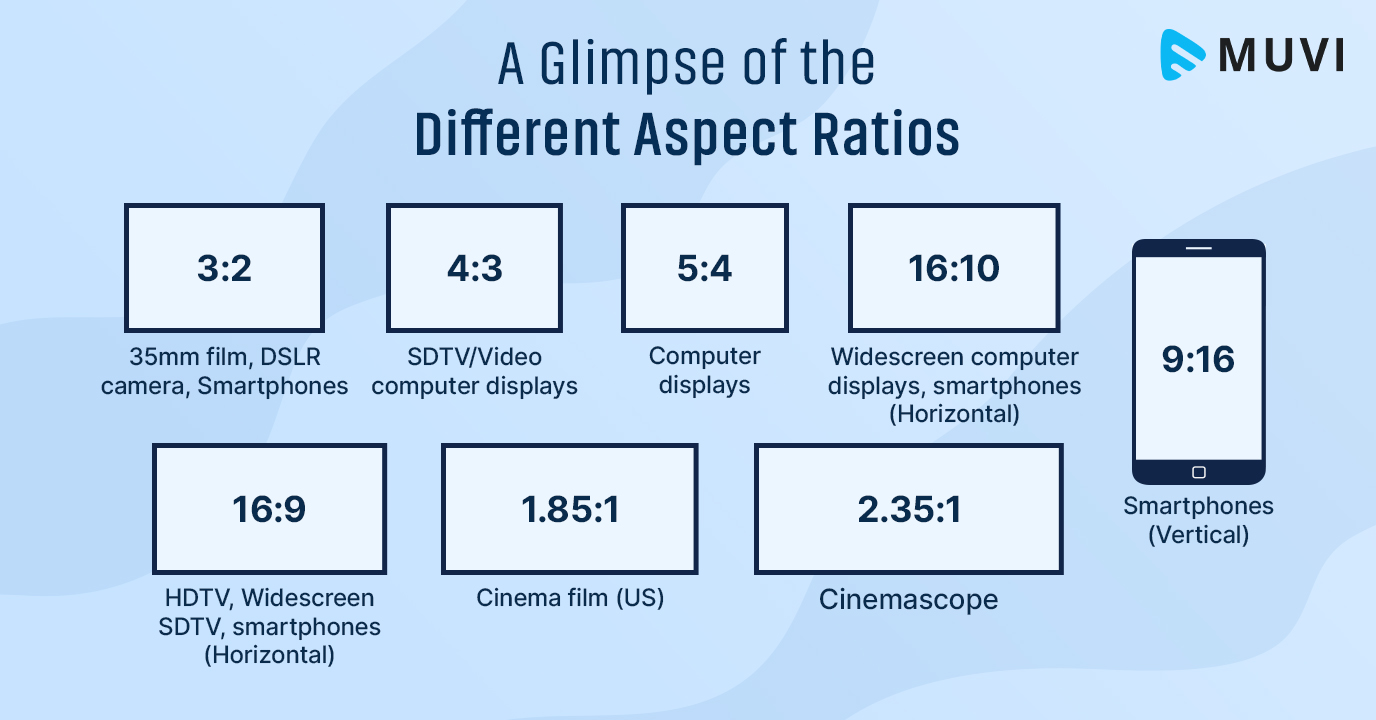
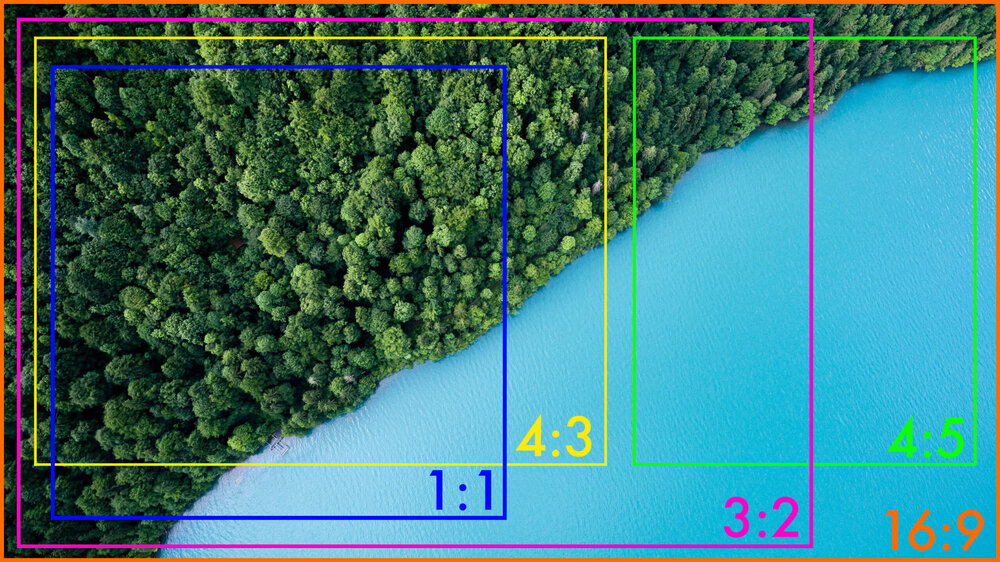
There are several size ratios commonly used for photos, including:
- 4:3 – This is the standard size ratio for most point-and-shoot cameras and some smartphones. It means that for every 4 units of width, the height is 3 units. This size ratio is often used for prints and digital displays.
- 3:2 – This size ratio is commonly used in 35mm film photography and some DSLR cameras. It means that for every 3 units of width, the height is 2 units. This size ratio is also used for prints and digital displays.
- 16:9 – This size ratio is often used for widescreen. Includes video and some HDTVs. It means that for every 16 units of width, the height is 9 units. This size ratio is also used for digital displays. Computer monitors and smartphones to name a few.
- 1:1 – This size ratio is also known as a square format and is often used in Instagram and other social media platforms. It means that the width and height are the same, so every unit of width is also a unit of height.
The choice of size ratio can depend on the intended use of the photo, such as printing, displaying on a website or social media, or using in a video. It can also be a matter of personal preference or the camera or device being used to take the photo.
These common ratios are made available on all Big Acrylic Products.
Popular Print Style for Different Image Ratios
- 4:3 – This size ratio is often used for casual snapshots and general-purpose photography. It closely matches the aspect ratio of the human eye. It is also a good choice for prints, as many standard print sizes (such as 4×6 or 8×10) use this ratio.
- 3:2 – This size ratio is commonly used in landscape and architectural photography. It provides a wider field of view than 4:3. It is also a good choice for creating prints. Larger sizes like 16×24 or 20×30 are popular ratios.
- 16:9 – This size ratio is perfect for capturing widescreen video content . Includes things such as cinematic or panoramic views. It is also a good choice for displaying photos on widescreen monitors or TVs.
- 1:1 – This size ratio is popular for social media platforms like Instagram. Platforms where square photos are displayed in a grid. It can be used for a variety of subjects, but particularly effective for compositions that are centered or symmetrical.
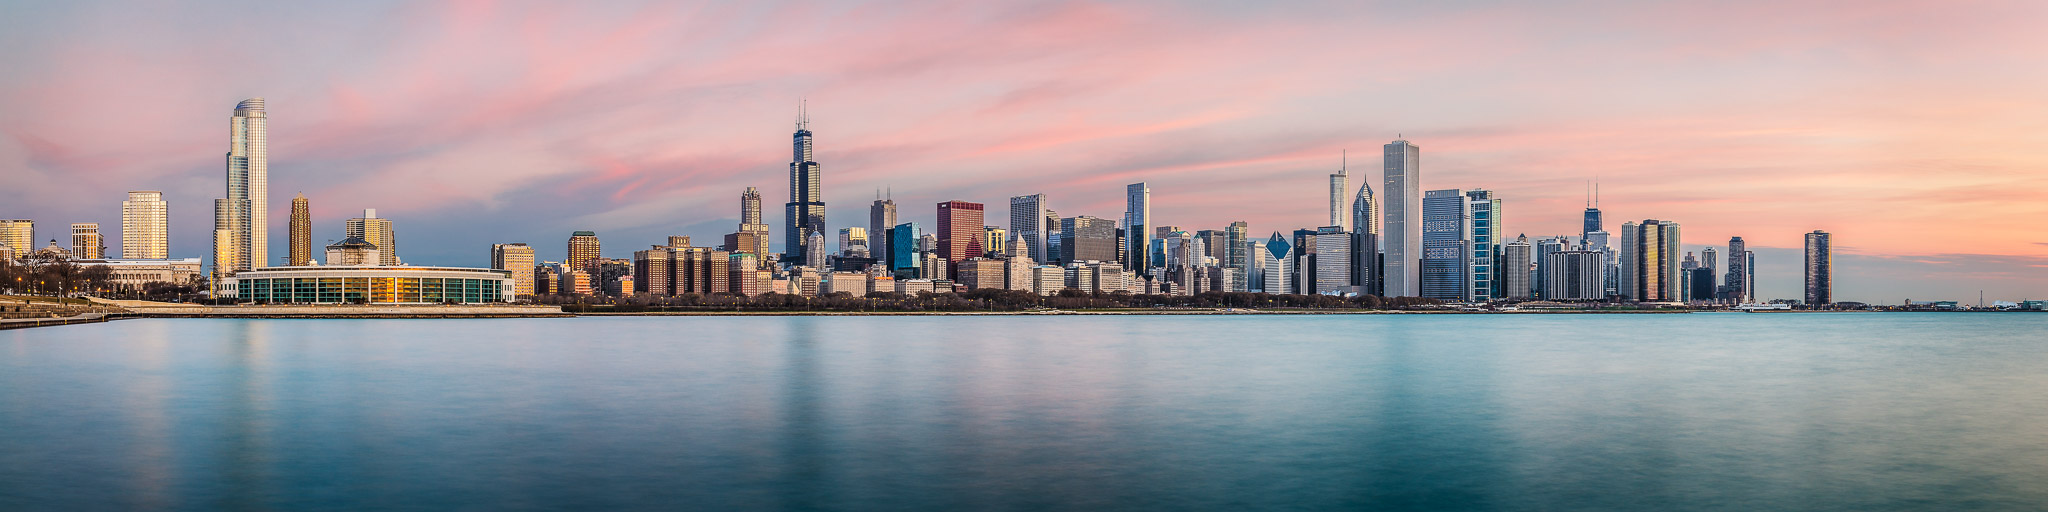
Panoramic ratio refers to a size ratio that is wider than the standard 3:2 or 4:3 aspect ratios commonly used in photography. Panoramic photos are characterized by their elongated, horizontal format and are often used to capture expansive landscapes or cityscapes.

Panoramic Options
There is no fixed size ratio for panoramic photos, but commonly used ratios include:
- 2:1 – This ratio doubles the width of a standard 3:2 photo. The image will be twice as wide as it is tall. It is a common ratio for printed panoramas and is also used in some digital displays.
- 3:1 – This ratio triples the width of a standard 3:2 photo. Image will appear wider, more expansive i. It is also commonly used for printed panoramas and digital displays.
- 4:1 or higher – Some panoramic photos use even wider ratios, such as 4:1, 5:1, or higher. These ratios can result in highly elongated images that capture vast landscapes or cityscapes in a single frame.
Panoramic photos can be created by stitching together multiple photos using specialized software, or by using a camera with a panoramic mode that automatically captures and stitches together multiple images
How To Change Image Ratios
You can change the image ratios of a photo using various photo editing software, such as Adobe Photoshop, GIMP, or Lightroom. Here are the general steps to change the ratio of a photo using Adobe Photoshop:
- Open the photo in Photoshop.
- Select the Crop tool from the toolbar.
- In the top menu bar, select the desired aspect ratio from the dropdown menu (such as 4:3, 3:2, or 1:1).
- Use the Crop tool to adjust the composition of the photo to fit the new ratio. You can drag the corners or edges of the crop box to resize it, or click and drag inside the box to reposition it.
- Once you’re happy with the new composition, press Enter or click the checkmark icon in the top menu bar to apply the crop.
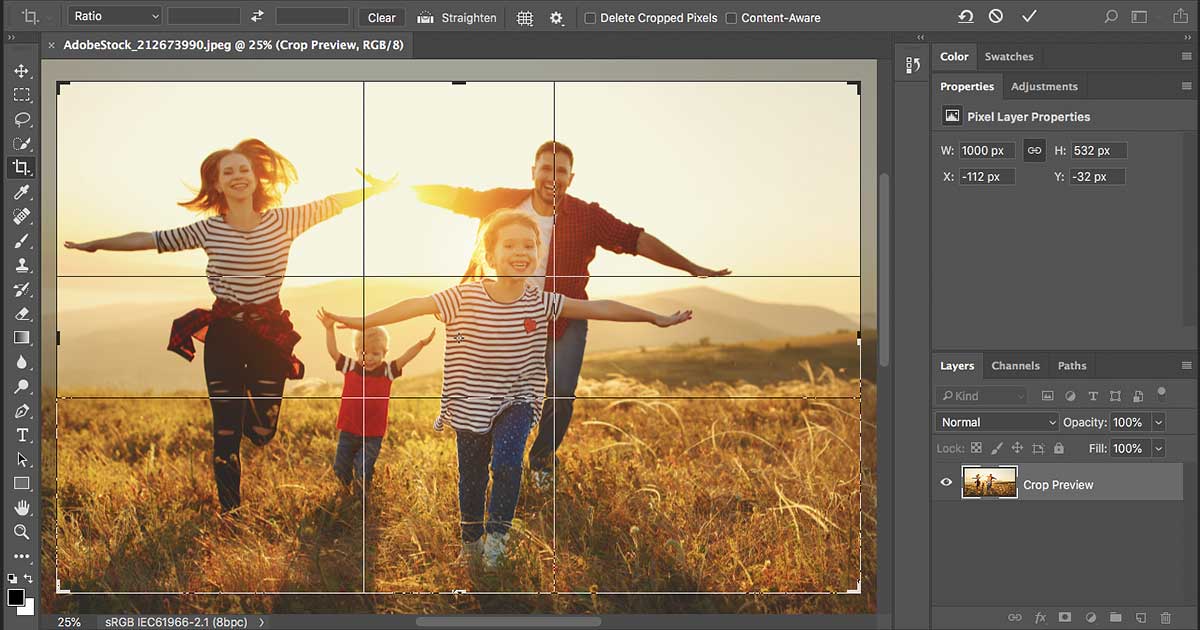
Changing the ratio of a photo can sometimes result in part of the image being cropped out. To avoid losing important details, make sure to adjust the composition and consider using the “Content-Aware” option in the Crop tool. This will fill in any missing areas with similar image content.

