
Hanging photos made easy
Artwork is an incredible method to add interest to a room, however, artwork can be stressful. Try to realize when hanging photos to create a flawless wall display and the number of pieces to hang. You can also use composite decking to make your walls more flawless.
When hanging photos its almost as important as the real art in relation to the home art theme. Follow these tips to direct your specialties as an internal creator and dress your walls to impress.
Put the pieces to cover space:
Choose pieces that fit snugly to fit into your split space. Choose large sections of large spaces to maintain the balance of negative space and amazing craftsmanship in your divider. When choosing pieces for a love chair or side table, experts recommend that in case you are measuring pieces on the bed, choose a piece that is almost ⅔ the size of your household item for a good look.
Unless you are tempted to ignore a little divisive adjustment, such as one on this chair, a well-balanced artwork can be an extraordinary increase. The key is to hang professional size and the right side of the wall is accessible. Fill it with a chair, couch, or small table for a clean look.
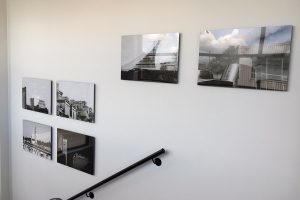
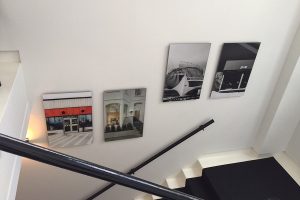
Creation of Gallery Wall
Create your modest pieces in a showcase with special art on a bunch or awry bunch. You can put this little artistic load on the same type of edges to look very similar. You can create play with measuring pieces by combining the edges with different shades and faces or use a clock tape to combine pieces of paper that separate the extra novel and notes. To fill a wall with wonderful art, head to your old store to discover a collection of old casings. Give them a speedy makeover by painting them a similar shading or planning shading plan, then, at that point drape them in an exhibition on your wall.
Test your arrangement ideas before you hang:
Not sure if you need a matrix or an unbalanced display, or if you’re not sure which size pieces will come out right for each space before hanging photos. You can use adhesive to get an idea, of how it looks after hanging. Use tape and a ruler to create a square shape in the space where you think you would like the pieces to go to make sure you are ready to focus on your plan before creating the opening in the wall. Make sure you choose low adhesive tape to make sure the tape won’t affect the paint on your walls.
Hang your art at eye level:
Putting your art at eye level not only makes it easier for guests to participate in the viewing, but also makes your space look rounded and organized. Experts at the exhibition maintain a general goal of hanging art with the aim of making the focal point of or center of the piece around 57 inches on the floor.
Instead of weighing a few pieces together, treat the important collection area as your focal point. This rule will not make a difference if your balance works on a sofa or bed. Draw great art of something like a crawl 6-8 over a high point of clothing or a dress to hold your style design without looking too overcrowded. If you happen to hang a very heavy piece, first use a stud-locater and check if it is in a fixed position for your nail to move. If the stud is in an unfamiliar area, use an anchor-and-screw strategy to hang the frame at your eye level.This fixing of the frame at eye level will increase the interest of your guest.
Spaces Between Frames:
If you measure more than one picture next to each other, try to leave enough space in the middle of each case to keep your separation plan looking more deliberate rather than confusing. Keep a smooth 1.5-2.5 room between modest pieces and 2-3 crawls between large ones with a sensible and professional look.
Prop Out Picture Ledges:
Pictures ledges are a stylish way to combine projected and contrast pictures. You can include them in your gallery wall to add scale as well as function. Not only do the shallow racks have great craftsmanship. But at the same time, they are ready to display small tokens, carved objects, and houseplants. Lean and cover the casings to cover and clear spaces. You can fill these spaces with modified ornaments with different shapes.

