Simple steps in creating the best panoramic photo prints
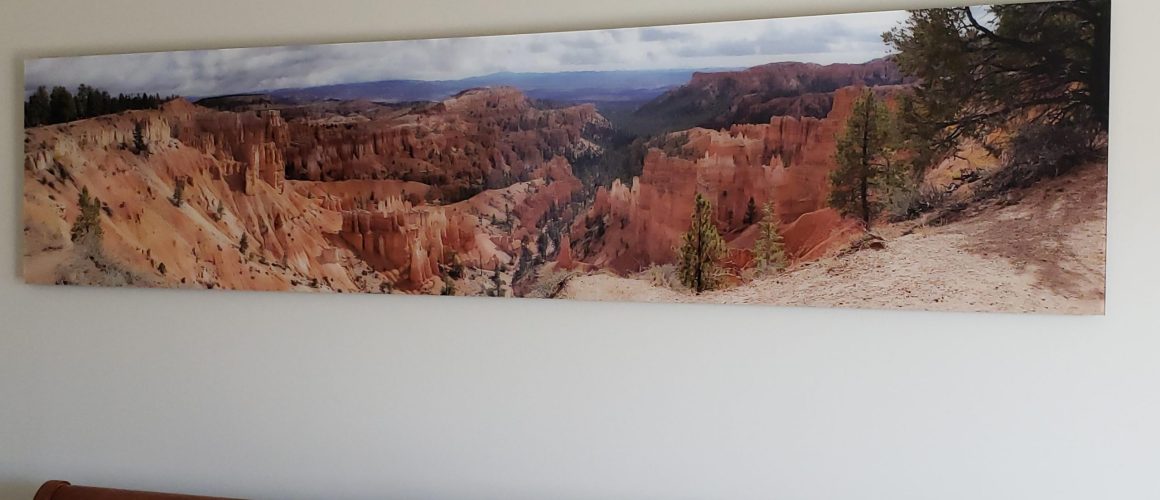
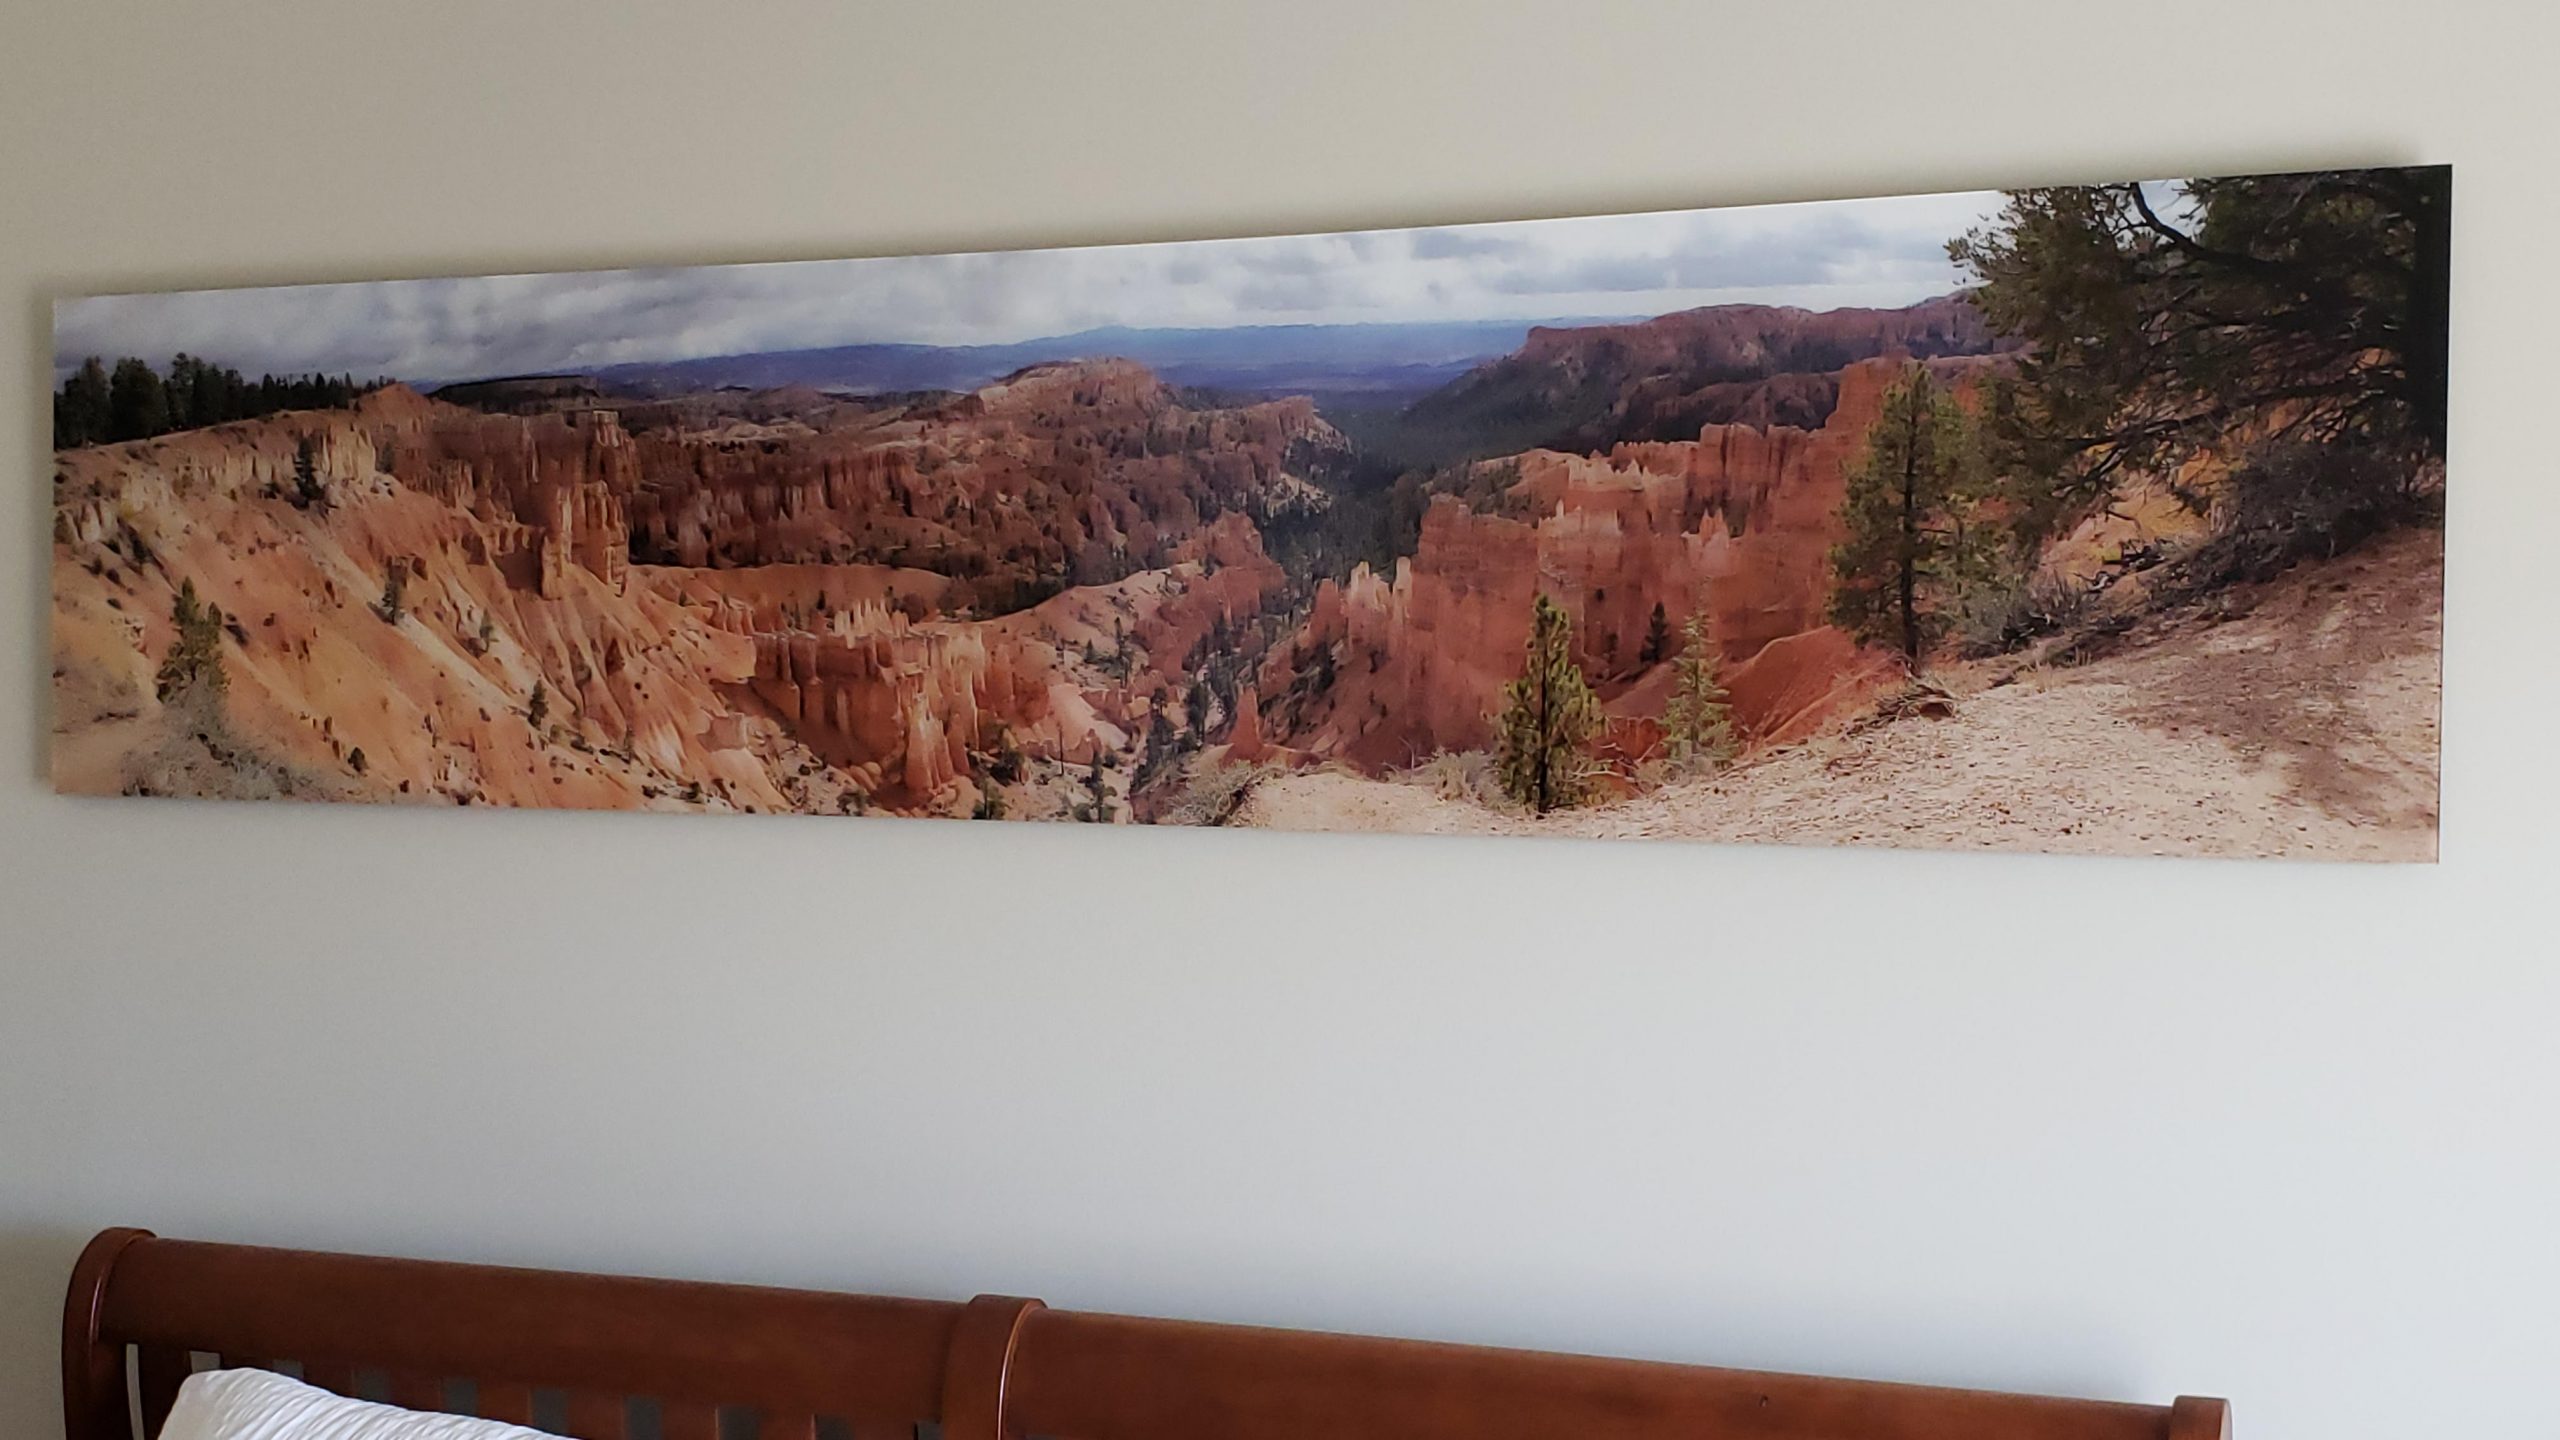
Mounting panoramic photo prints on walls can prove to be a delightful and fulfilling undertaking. By carefully planning, you create a mesmerizing showcase that captivates the beholder. Let your walls do the talking with panoramic photos.
Discover ten comprehensive guidelines for hanging panoramic photo prints on walls. . Each point offers expert tips and detailed instructions to ensure optimal positioning, balance, and stability. Transform your walls into breathtaking showcases of visual storytelling and elevate your decor to new heights.
Best strategy for
To take panoramic photo prints with your camera, follow these general steps:
- Choose the Right Camera: While most modern smartphones come with built-in panoramic modes, some dedicated digital cameras may also have this feature. Look for a camera with a panoramic mode or a wide-angle lens.
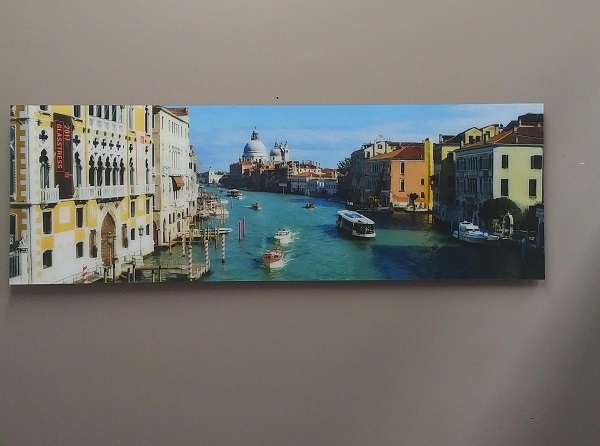
- Find a Suitable Scene: Panoramas work best with wide, open landscapes or cityscapes. Look for scenes with interesting details from left to right, and minimal movement between shots.
- Use a Tripod (Optional): While not necessary, using a tripod can help ensure stable shots and smoother alignment between frames.
- Set Your Camera to Panoramic Mode: If your camera has a panoramic mode, activate it. This mode guides you through the process, ensuring proper alignment and overlap between frames.
- Shoot in Landscape Orientation: Turn your camera horizontally to capture a wider field of view.
- Start from One Side: Begin from one side of the scene and move the camera smoothly, keeping it level, to capture the first frame.
- Overlap Each Shot: To create a seamless panorama, make sure each consecutive shot overlaps the previous one by about 20-30%. This overlap helps stitching software connect the images smoothly.
- Maintain Consistency: Keep the same exposure and focus settings across all shots to maintain consistency in the final panorama.
- Avoid Moving Subjects: Panoramic photos work best when there are minimal moving subjects, as they can cause distortions in the final image.
- Review Your Shots: After capturing all frames, review them to ensure you have captured the entire scene and that there are no missing or misaligned shots.
- Stitch the Photos Together: Use photo stitching software to combine the individual shots into a single panoramic image. Many cameras and smartphones have built-in stitching options, or you can use dedicated software like Adobe Photoshop or specialized panorama apps.
- Crop and Adjust (Optional): Once stitched, you can crop the image to remove uneven edges and make any necessary adjustments to enhance the final result.
Preperation
Remember that practice makes perfect, and you might need a few attempts to get the hang of capturing beautiful panoramas. Experiment with different scenes, angles, and camera settings to achieve stunning panoramic shots. some good info here as well
- Measure and Plan: To begin, start by measuring the wall space where you envision hanging the panoramic pictures. Take into consideration the dimensions of the pictures. Check spacing you desire between each frame. You may find it helpful to create a layout on paper or utilize digital design software to visualize precisely how the pictures will complement your wall. This extra step can aid in ensuring a harmonious and captivating final display.
- Choose the Right Frames: When choosing frames for your panoramic pictures, it’s important to consider the style that best complements not only your pictures but also the overall decor of the room. Opt for frames that have a wide border. It adds an elegant touch and enhances the visual impact of the prints. Additionally, ensure that the frames have a secure hanging mechanism. To confidently display your panoramic masterpieces without the worry of it falling. Make certain that they can sufficiently support the weight of the prints. By taking these aspects into account, you can create a captivating display that truly brings out the beauty of your panoramic photographs and adds a personalized touch to your space.
- Prepare Hanging Hardware: Attach hanging hardware. Such as D-rings or sawtooth hangers, to the back of each frame. Ensure that the hardware is level and securely attached to the frame to prevent the pictures from tilting on the wall.
- Locate Wall Studs: For large and heavy panoramic pictures it’s essential to hang them on wall studs for added stability. Use a stud finder to locate the studs behind the wall. This will provide a more secure anchor point than just using drywall.
- Mark the Wall: Based on your layout design mark the positions of the pictures on the wall using a pencil. Use a level and measuring tape to ensure the marks are straight and evenly spaced.
- Protect the Wall: Consider using removable adhesive strips or hooks if you want to avoid putting holes in the wall. However, for larger and heavier panoramas, it’s best to use nails or screws directly into the studs for better support.
- Position and Hang Pictures: Enlist the help of a friend or family member to hold the pictures against the wall while you step back to check the alignment and positioning. Once satisfied, begin hanging the pictures, starting from one end of the display and working your way across.
- Leveling: Use a level to ensure each panoramic picture is straight and aligned with the others. Adjust as necessary to achieve a visually balanced and harmonious arrangement.
- Maintain Consistent Spacing: To maintain an even and uniform look, use spacers between the frames. You can purchase picture-hanging spacers or create your own using small pieces of cardboard or foam.
- Final Adjustments: Step back and assess the overall appearance of the display. Make any final adjustments to the positioning and leveling as needed
Popular Sizes
Panoramic photo prints can vary depending on the aspect ratio and the intended use. Some popular panoramic sizes commonly used for printing and framing are:
- 8×20 inches: This size is a classic panoramic ratio with a 1:2.5 aspect ratio. It’s great for capturing wide landscapes and cityscapes.
- 10×30 inches: With a 1:3 aspect ratio, this size is perfect for showcasing wide vistas and scenic views.
- 12×36 inches: Offering a 1:3 aspect ratio as well, this size is commonly used for panoramic shots of nature and skylines.
- 16×48 inches: With a 1:3 aspect ratio, this larger size is ideal for creating dramatic panoramic prints of breathtaking landscapes.
- 20×60 inches: This size, with a 1:3 aspect ratio, is excellent for large-scale panoramic prints that command attention and add visual impact to a space.
- 24×72 inches: With a 1:3 aspect ratio, this is an even larger option for showcasing expansive panoramic views.
- 30×90 inches: Offering a 1:3 aspect ratio, this size is suitable for grand panoramic displays, capturing vast landscapes and city skylines in stunning detail.
It’s worth noting that panoramic sizes can vary beyond these standard dimensions. Photographers often choose custom sizes to suit their specific artistic vision . Additionally, panoramic sizes can be printed horizontally or vertically. This offers flexibility in creating unique and captivating compositions. When selecting a panoramic size, consider the aspect ratio that best complements the content of your image. Then match it to the space that looks best on the wall.
The Cameras
- Sony: Sony mirrorless cameras, particularly from their Alpha series, often have superior image sensors, high resolution, and advanced features like in-camera panorama stitching.
- Nikon: Nikon’s DSLRs and mirrorless cameras have robust image quality and features like a built-in panorama mode that helps create seamless panoramic shots.
- Canon: Canon’s EOS series DSLRs and mirrorless cameras offer good image quality and features, including panorama mode for easy stitching.
- Fujifilm: Fujifilm’s mirrorless cameras, especially those equipped with their high-quality X-Trans sensors, can capture stunning panoramic shots.
- Panasonic: Panasonic Lumix mirrorless cameras, particularly the models with high-resolution sensors and advanced image processing, are suitable for panoramic photography.
- Olympus: Olympus mirrorless cameras, especially from their OM-D series, offer features like Live Composite that can be useful for certain types of panoramas.
- Ricoh/Pentax: Some Ricoh and Pentax cameras have built-in panoramic modes and come with high-quality lenses for capturing detailed panoramic images.
- Hasselblad: Hasselblad’s medium format cameras are renowned for their exceptional image quality, which can be advantageous for capturing panoramic landscapes with incredible detail.
- Leica: Leica cameras, known for their premium lenses and build quality, can deliver stunning panoramic images when paired with high-resolution sensors.

